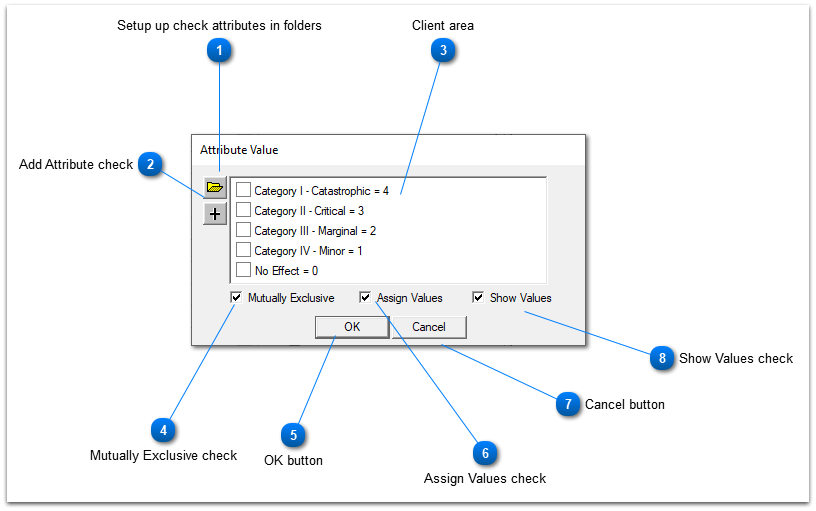
The checklist attribute is used to represent sets of enumerated values. With checklists, a list or tree of choices can be developed so that when it comes time to assign values, the values are easily chosen from the predefined list. One example where one might wish to set up a checklist attribute is to define the maintenance level for an object. In the following example, a checklist has been set up to allow the Analyst to choose between three maintenance levels (the Attribute Value dialog can be invoked by clicking on one of the "Edit Default" buttons on the Attribute Definitions dialog):
Shown here is a checklist attribute setup panel showing how to setup the MIL STD 1629 Severity checklist attribute
Setup up check attributes in folders
- Folder Icon - Use this icon to create a new folder in the tree.
Allows lists of checklist attributes to be segregated into separate lists (ex: Food attributes - Drink attributes) When selected Flolders will appear in "Attribute Value" window into which can be named and into which separate checklist attributes can be added (Ex: 1) Food Folder would contain checks for Pizza, donuts,etc. 2) Drink folder would contain checks for tea, milk, beer etc.
Add Attribute check
- Plus Icon - Use this icon to create a new checkbox
For each attribute to be added the Analyst checks the + button
Client area
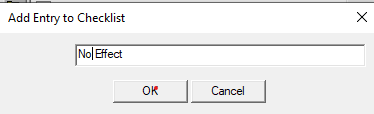
Each name here is generated by the Analyst after selecting plus in the window shown below
Mutually Exclusive check -
Mutually Exclusive - Restricts entry so that only one checkbox can be checked at a time. This is the default, and is required if values are to be assigned.
OK button
Exit keeping entries
Assign Values check -
Assign Values - Marking this checkbox allows values to be assigned to each checkbox. This has the advantage of allowing checkbox attributes to compute into a known result so that they can be used in other calculations. To add a value to each Check attribute
-
Cancel button
Cancel Setup (Abort)
Show Values check -
Show Values - When values have been assigned, this checkbox will show those values by including an equals sign in the checkbox followed by the value.
This helps whoever is assigning values see the result should the attribute be computed.
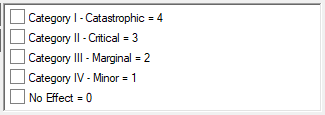
This allows the Analyst to display the values This example is the MIL STD 1629 Severities. NOTE: Its Values are the reverse of the roman numerals
(Reason: The higher the number the worse the problem but the Lower the Vategory the more important the Severity is)