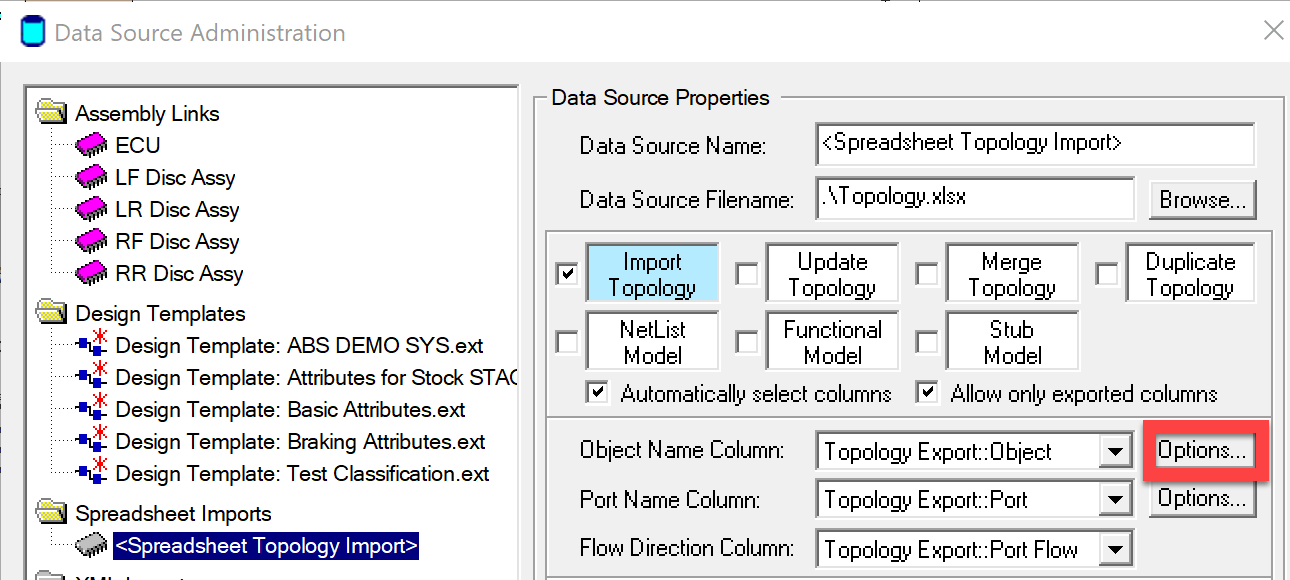
The Object Appearance panel on the Topology Import Options dialog provides a series of fields that allow the Analyst to customize the way that object appearance is treated by the eXpressSpreadsheet Topology Import. This panel can be accessed by clicking on one of the "Options..." buttons on the Main Topology Import Panel and then selecting the Object Appearance tab on the Topology Import Options dialog (the Analyst can go straight to this panel by clicking on the "Options..." button to the right of the Object Name Column dropbox).
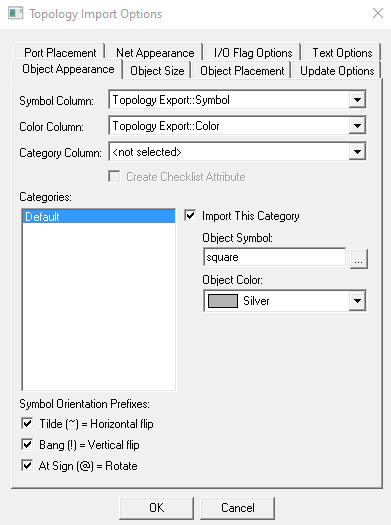
The Object Appearance options panel appears as follows:
At the top of the panel are three dropboxes that allow the Analyst to select the spreadsheet columns that contain the Symbol, Color and Category associated with each object to be imported.
The entries in these dropboxes are automatically selected when the Automatically select columns checkbox is enabled on the Main Topology Import panel. These dropboxes can be de-selected to prevent the symbols or colors listed in the spreadsheet from being assigned to the imported objects. The symbol and/or color will then be based on the Default category (or, when a Category Column is selected, from the settings for that object's category)
The Symbol Orientation Prefixes checkboxes at the bottom of the panel are active when the Symbol Column is selected. Each checkbox specifies whether a given prefix should be taken into consideration.
The Category Column, because it does not correspond to an eXpress object property, is not exported by the eXpress Model topology export. If categories are included in the spreadsheet, however, they can be used to define the appearance and/or placement of the imported objects. When a category column is selected, the Categories list in the middle of the dialog is filled out with each unique category listed in the spreadsheet. For each category, the Analyst can specify whether the corresponding objects are to be imported, as well as the symbol and color to be assigned to objects in that category.
When a Category Column is selected, the Create Checklist Attribute checkbox will also be enabled. When this import option is selected, a checklist Attribute will be automatically created for that category during import (the Analyst will be able to select the Attribute name in an edit box that appears when the checkbox is selected). For each imported object, the corresponding category will be selected in the checklist Attribute.