The RPN detection rating is a qualitative measure of how well a given failure can be detected by diagnostics. Because eXpress FMECA charts can be linked to a diagnostic study, the software can automatically determine how well each failure is detected. eXpress offers two ways of doing this—by percentage or by attribute.
To calculate detection ratings by percentage, simply add the “Detection Rating (for RPN)” field to the included columns list. The detection rating will then be calculated based on the percentage of root failure modes that are detected for each failure. By default, failures that are fully detected will be assigned a 1, failures that are non-detected will be assigned a 10, and failures that are partially detected will be assigned an integer between 1 and 10 based on the percentage of root failure modes detected.
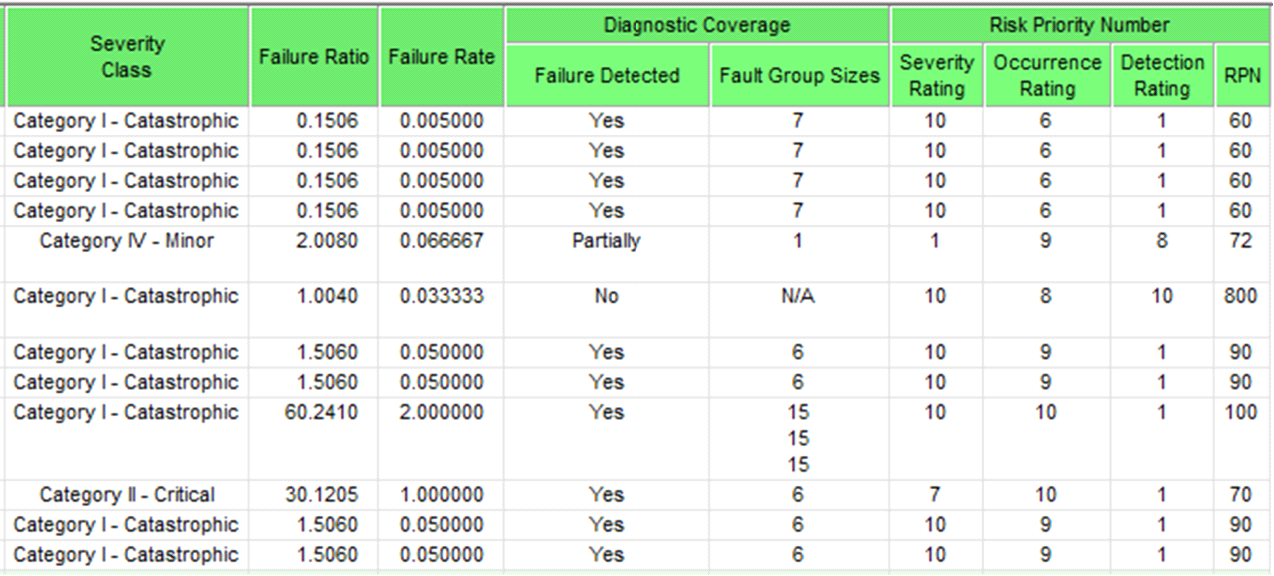
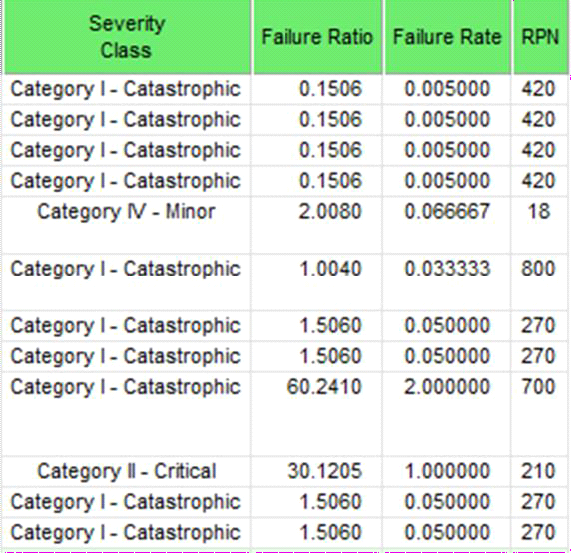
The excerpt to the left shows how detection ratings might appear when calculated using the percentage method. In this example, eXpress determined that the partially detected failure should map to the detection rating 6.
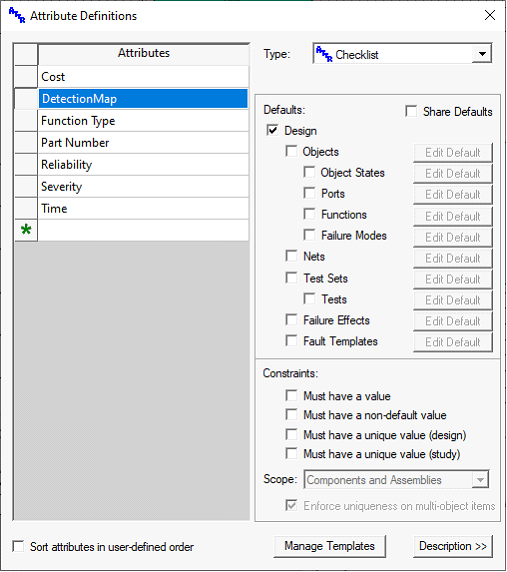
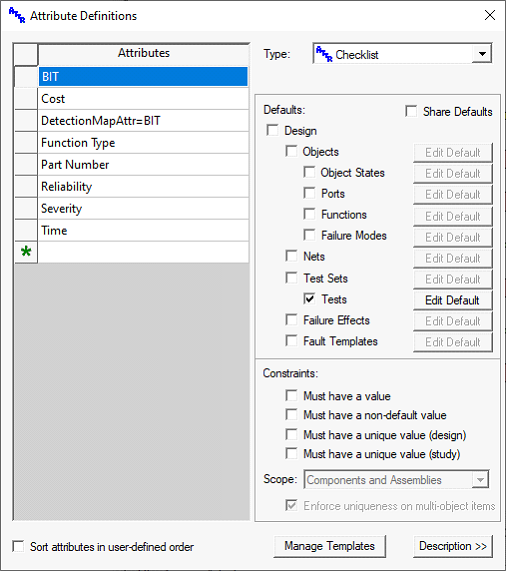
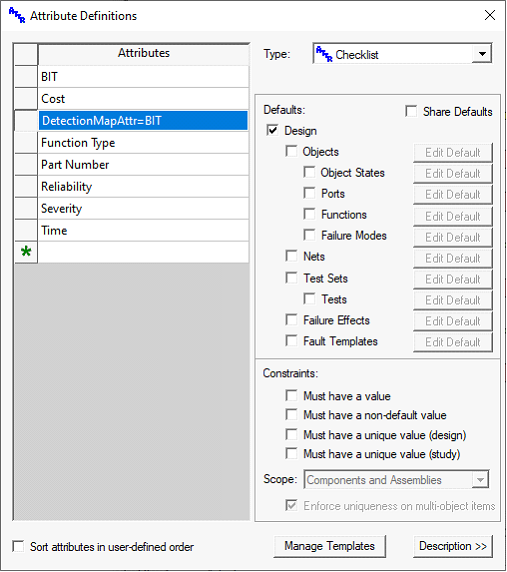
As with severity and occurrence ratings, you can override the detection rating mapping mechanism using a checklist attribute. A detection map attribute must be set up as follows:
It must be named “DetectionMap”
· It must be of type Checklist
· It must be associated with the Design
· It must be “Mutually Exclusive”
· It must have Test limits assigned
· It must have one entry for each desired Detection rating (on a 10-point scale) to which detection percentages will be mapped
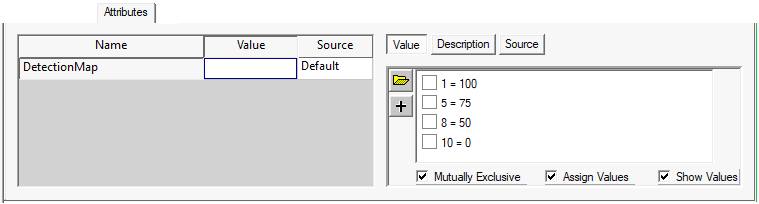
· For each entry, assign the minimum detection percentage (from 0 to 100) that is to be mapped to that entry This detection map will result in the detection rankings 1, 5, 8 & 10, with the numbers intentionally skewed to emphasize non-detectable failures (75% detectability is only mapped to a 5, for instance).
Using this detection map, the detection ratings in the calculated FMECA would appear as follows:
Notice that the partially detected failure is now mapped to a detection rating of 8 (rather than 6).
The second way of calculating a RPN detection rating in eXpress is the “rating by attribute” approach. Use this approach when the detection rating should be based (at least in part) on the category of test (e.g., BIT class) that detects the failure.
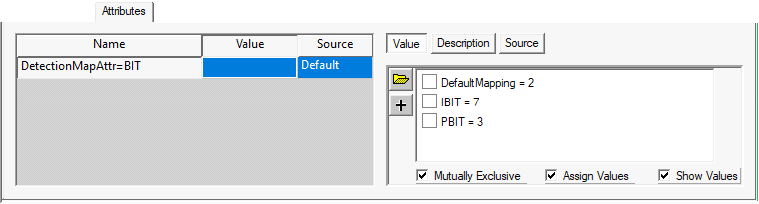
This approach requires two checklist attributes—one per test to specify the category, and at the design level to specify how the different test attributes (categories) map to detection ratings.
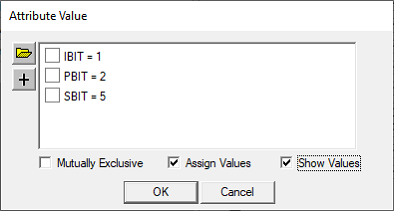
In this example, three BIT types have been defined for tests—IBIT, PBIT & SBIT. The assigned Test limits are not necessary; they are used to control the order in which the Test limits are listed when tests are included in multiple categories (the highest Test limit is listed first). At the design level, create a checklist attribute named “DetectionMapAttr=XXXXX” (where XXXXX is replaced with the name of the attribute containing the test categories, in this case “BIT”).
Add an entry for each category that you wish to map (in this case IBIT and PBIT), as well as an optional entry called “DefaultMapping” to be used for tests whose categories are not included in the list. Assign the desired detection ratings as Test limits. The excerpt below shows how detection ratings appear when calculated using the attribute method. Use independent-mode diagnostics when you wish to base detection ratings on all tests that could possibly detect each failure. The detection rating will be based on the test whose category attribute has the highest assigned Test limit. If, on the other hand, you wish for the rating to be based on the tests in an ordered sequence that detect each given failure, use standard diagnostics.
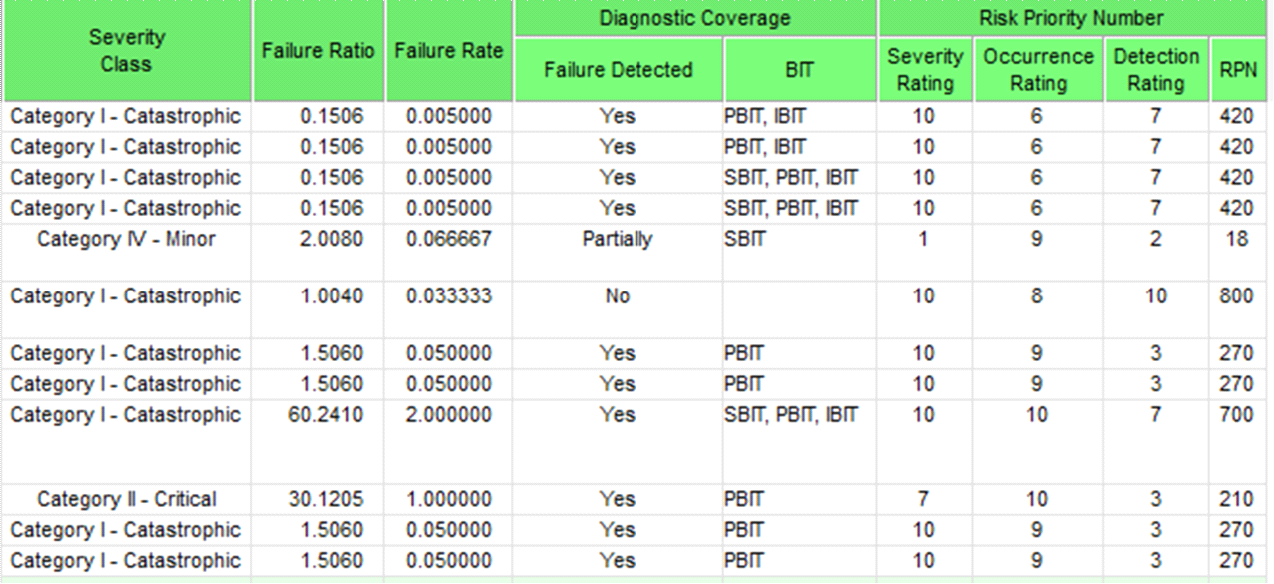
In the example above, for tests that were both PBIT and IBIT, the Test limit 7 was assigned (the greater of the Test limits for PBIT and IBIT). The failure that is only detectable using SBIT, however, was assigned the default mapping Test limit of 2 (since there is no entry for SBIT in the mapping table). Finally, notice that non-detected failures are automatically assigned a detection rating of 10.
The severity, occurrence and detection factors that are used to calculate the Risk Priority Number (RPN) are calculated separately from the individual severity, occurrence and detection ratings that appear in their own columns. This means that—if you wish—you can include the RPN column without having to also include the columns for the three ratings. In this example, the existence of the attribute “DetectionMapAttr=BIT” caused the RPN calculation to utilize attribute-based mapping—even though neither the BIT categories nor the detection ratings appear anywhere in the FMECA. As with the severity and occurrence ratings, you can override the calculated detection rating by creating a detection rating attribute and then assigning Test limits for each failure in the FMECA.
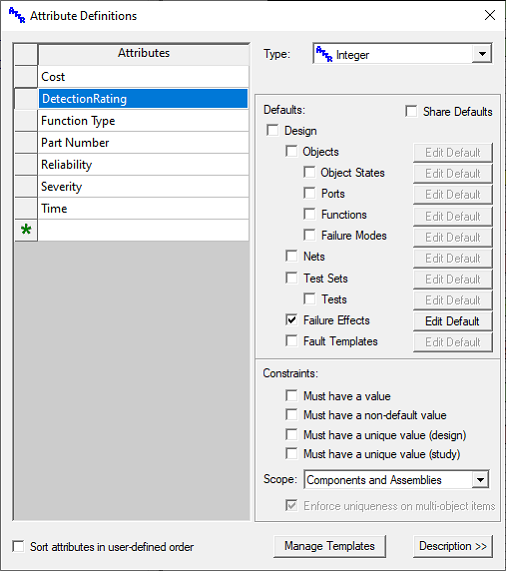
Create an attribute named “DetectionRating” and select Integer as the attribute type. Set up the attribute so that it is only associated with Failure Effects. Use this attribute to separately define the Test limit to be used for the RPN detection rating for each failure in the FMECA. Attribute Test limits must be assigned to object failure effects (not design effects). Detection ratings will thus be associated with the failure for each line in the FMECA, rather than the end item effects. Although this approach allows you to assign any detection rating to any failure, it does not validate the entries. It is up to the Analyst to ensure that the assigned detection ratings are valid and within range.
When included in the FMECA, the detection rating attribute will be used (instead of the built-in detection rating calculation) when calculating the Risk Priority Number.
In the example FMECA setup dialog picture at right below, the “DetectionRating” attribute is being used to supply the detection rating.
Notice that a double backslash has been inserted between the words “Occurrence” and “Rating” in the name field at the bottom of the dialog. This will cause the two words to appear on separate lines in the FMECA header. Alternatively, you can insert a space to see the two words on a single line in the header.