Custom Symbols can be created using raster images which are specific and/or unique to programs, companies, customers or applications. NOTE: When custom symbols are used in a model, The saved model will include all symbols used in that model.
Creating New Custom Symbols
1. To create custom symbols for an eXpress Symbol library, select the graphic images you intend to use. This will typically be a jpg or other raster format. If the image is already in png (portable network graphics) format, you are good to go. If not, then using a graphic editing program like Photoshop, Gimp, etc., open the image and then save the image to the png format.
2. Open MS Word and insert a square box from the shapes library. Make sure it has a fill color. Size the box to about the page width to accommodate your image.
Note: the box shape cannot have any rounding, shadowing, beveled edges, etc.
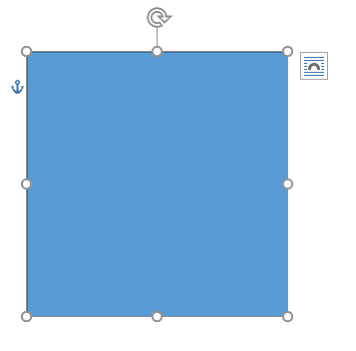
3. Now insert or copy the edited image and place it directly over (centered) the box. The image may get placed behind the box so that only the box is visible. If so, it may look like this.
1
To create custom symbols for an eXpress Symbol library, select the graphic images you intend to use. This will typically be a jpg or other raster format. If the image is already in png (portable network graphics) format, you are good to go. If not, then using a graphic editing program like Photoshop, Gimp, etc., open the image and then save the image to the png format.
2
Open MS Word and insert a square box from the shapes library. Make sure it has a fill color. Size the box to about the page width to accommodate your image.
Note: the box shape cannot have any rounding, shadowing, beveled edges, etc. Any drawing program may be used that creates a metafile.
3
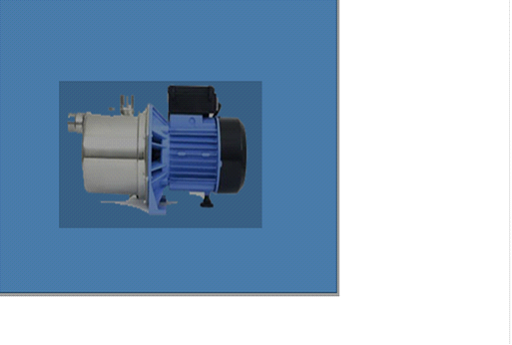
Now insert or copy the edited image and place it directly over (centered) the box. The image may get placed behind the box so that only the box is visible. If so, it may look like the image below. This problem is fixed by using the Layout Options and there are 3 ways (step 4) to set these options as described below.
4
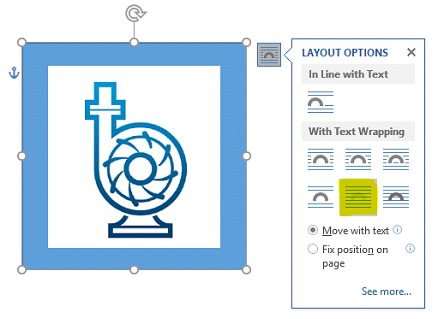
Select the “Layout Options” Icon (upper right side) and select the “Behind Text” option (highlighted yellow in the image below).
4
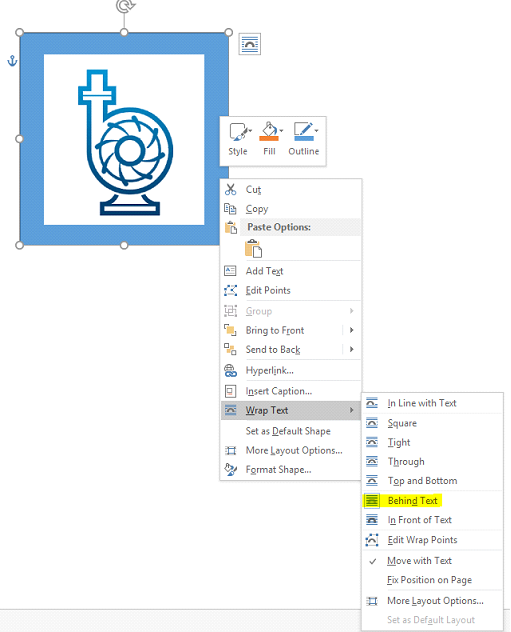
Alternate: Another way to get to Layout Options is to right-click on the box and select Wrap Text > Behind Text as shown highlighted below.
4
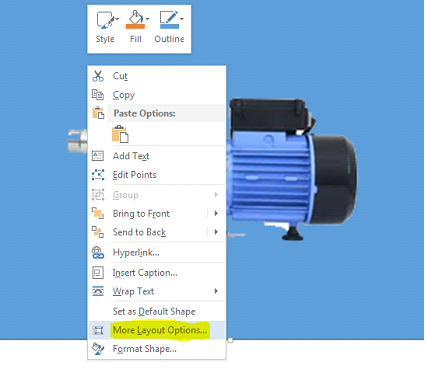
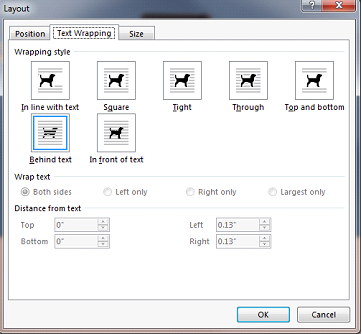
Alternate: For more Layout Options, right-click and select “More Layout Options”. Then from the Text Wrapping tab, select “Behind Text” as shown in the second image below.
5
Select both objects in MS Word by dragging mouse from top of picture to bottom. Image will be grey when selected. These two objects (box + image) together will form the new custom symbol.
6
Copy both objects (Ctrl+C) and paste (Ctrl+V) into a new symbol folder in eXpress.