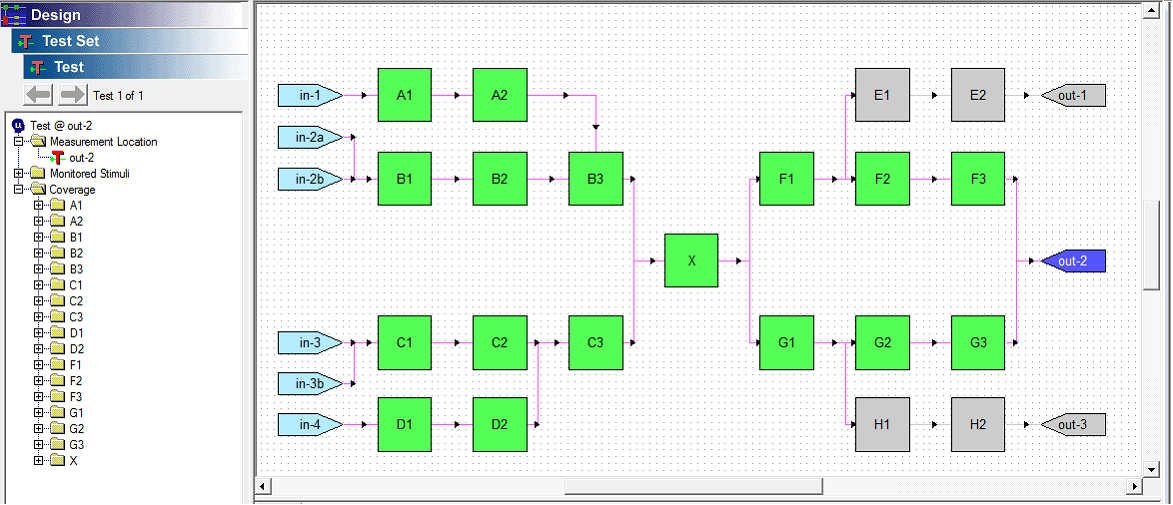
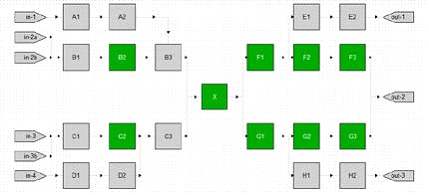
Coverage Anchors provide a powerful new way of editing the coverage of a path-based test so that it includes only functions or failure modes that are either upstream or downstream from selected function(s) or failure mode(s). Let’s use an imaginary design to help understand how test coverage anchors work. The following example depicts the coverage of a Analyst-initiated test defined at the second (middle) of the three output flags at the right. By default, the test’s coverage contains all functions upstream from the selected output flag:
How to set a function or failure mode as an anchor in a test
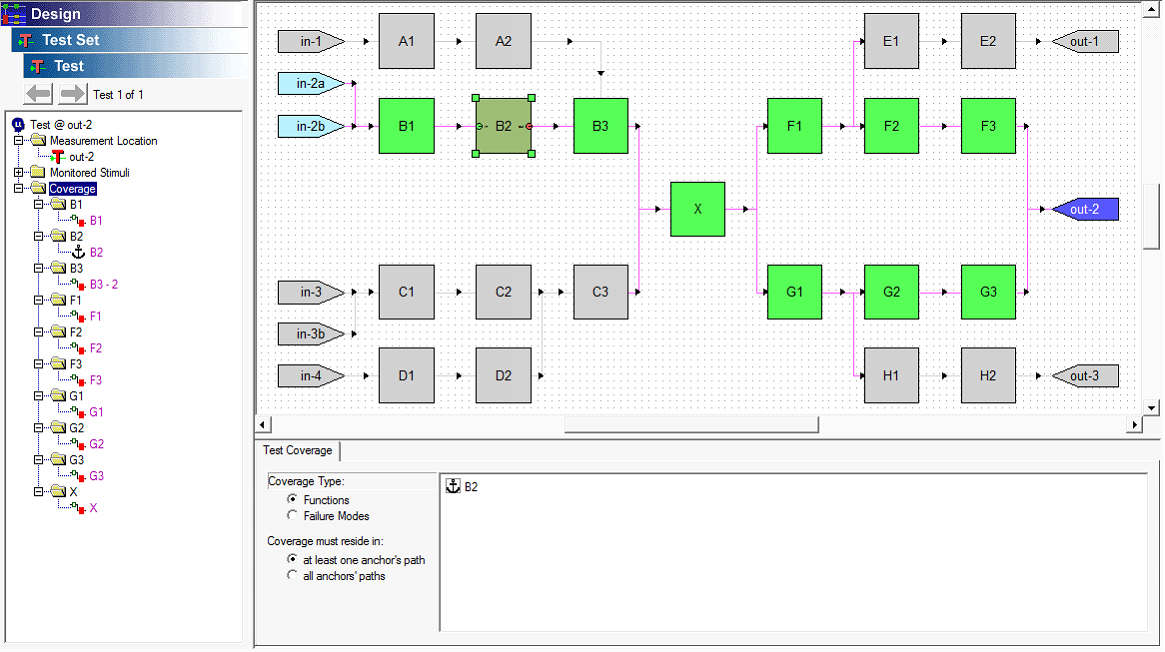
To set a function or failure mode as an anchor with the test open, select the item on the model. The coverage functions in the test for that item will show up in the Context Panel with a checked checkbox for each item that is coverage in the test. Select the Function that is to be the anchor twice. eXpress will first remove the item from the coverage and the second time it is selected will change it to an anchor and the model will reflect this with a different color green. Items no longer in the coverage will become grey as shown below.
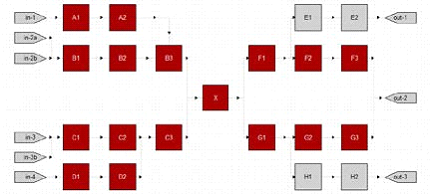
In the following example, the Analyst has used the Test Coverage panel to specify that B2 is a coverage anchor:
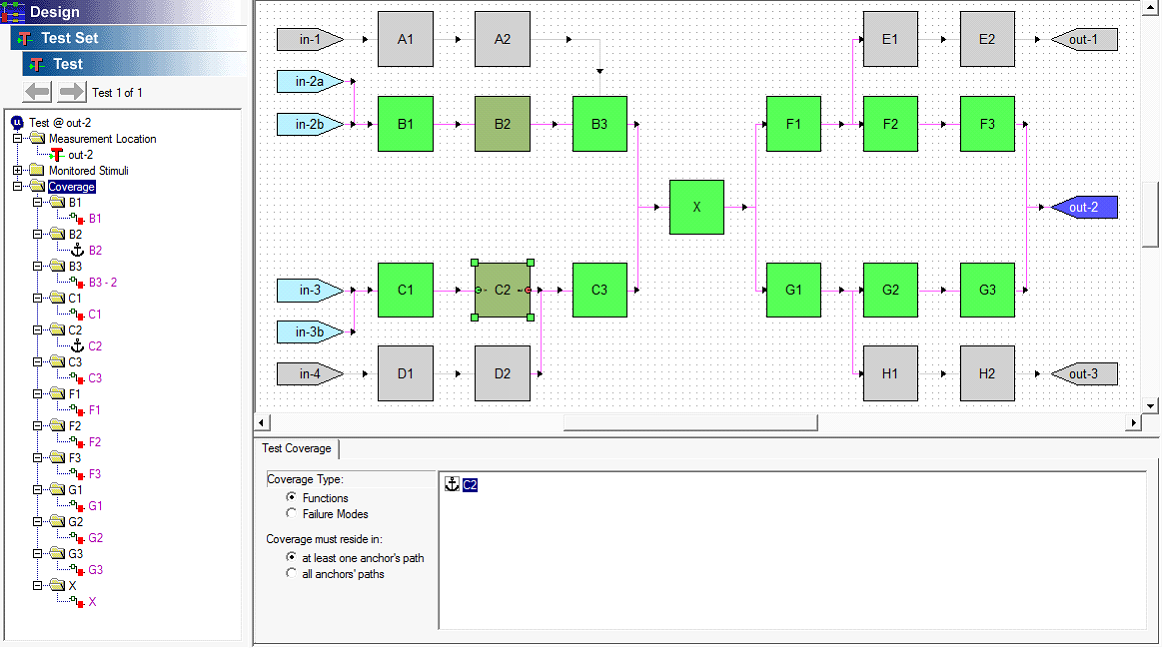
By selecting B2 as an anchor, the test’s coverage has been reduced to only those functions that are upstream or downstream from B2 (the coverage must still all be upstream from the selected test location, of course). Any function (or failure mode) in a test’s coverage can be used as an anchor by clicking on the checkbox beside that function on the Test Coverage panel or right- clicking on that function in the coverage list in the Explorer Tree and selecting “Use as Coverage Anchor” from the pop-up menu. A single test can have multiple coverage anchors:
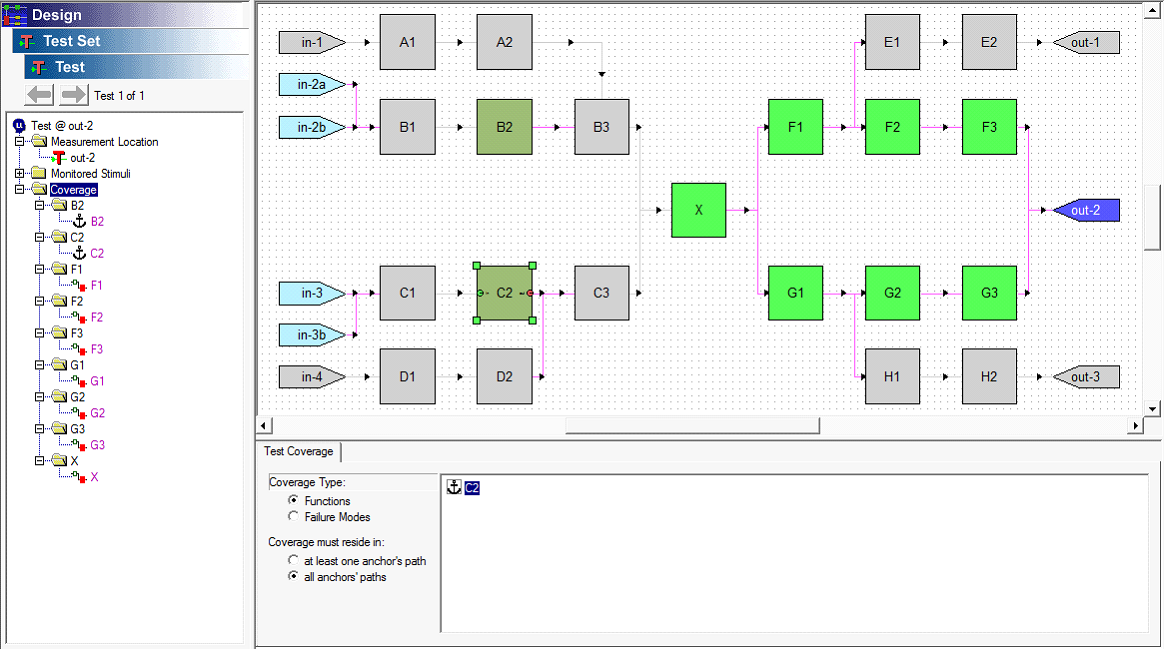
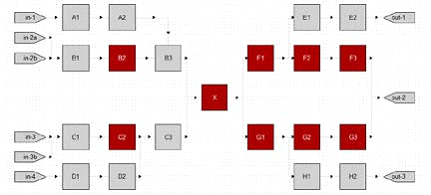
By default, when multiple anchors are selected for a test, the coverage will consist of all functions or failure modes that are either upstream or downstream from any of the selected anchors (as shown in the previous example). On the Test Coverage panel, however, there is also the option to include only functions/failure modes that included in all anchors’ paths (that is, upstream or downstream from all selected anchors). Here is how the coverage is calculated for the same two anchors when this setting is used for the test:
Notice that, with this setting, the coverage is constrained to the intersection of all paths that travel through the selected anchors.
When an anchored test is used by the diagnostics, it is—by default—asymmetric. When the test passes, only the anchored coverage is proven good; when the test fails, however, all functions in the original (unanchored) coverage are called into suspicion. The following two images show the way that the diagnostics will interpret this test when it passes (left) and when it fails (right):
If, however, you disable the new “Assume Interference from Unanchored Coverage” checkbox on the Test Interpretation panel (or in Grid View), the diagnostics will interpret this test as follows:
Finally, four new operations were added to the Tests submenu of the main Design menu.These four batch operations allow you to remove all anchors from selected tests
1. Remove Coverage Anchors
2. Remove All Coverage Anchors
3. Remove Selected Coverage Anchors
4. Remove Selected Anchors from All Tests
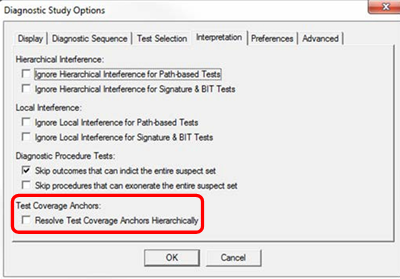
A new “Resolve Test Coverage Anchors Hierarchically” setting has been added to the Interpretation panel of the Diagnostic Study Options dialog (shown at right).
When this option is enabled, test coverage anchors will be resolved hierarchically during the calculation of diagnostics, with lower-level functions that are not downstream from an anchor being removed from tests’ coverage