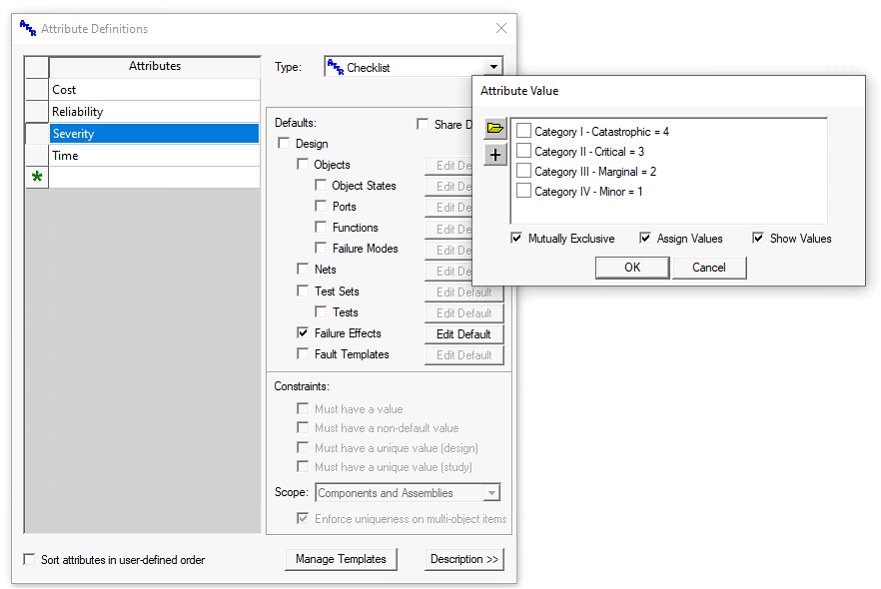
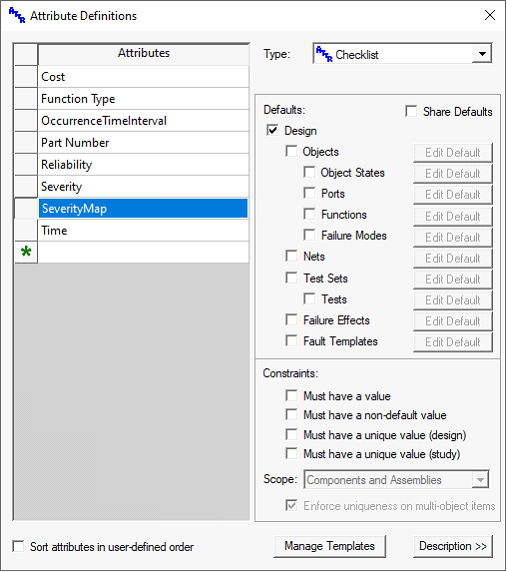
For a given failure, the RPN severity rating is derived from the severity class that has been assigned to end item effects that include that failure among their causes. If more than one end item effect includes that failure among their causes, the one with the highest severity is used in the calculation. Most eXpress models override the built-in severity classes using a checklist attribute to define the different severity levels that can be assigned to a failure effect. The example below shows the checklist “Severity” attribute that would be used to override the default severity classes with those defined within MIL-STD-1629A.
To override severity classes in eXpress, the attribute must be a checklist attribute named “Severity” that is associated only with failure effects. The different classes are entered as entries in the checklist. The “Mutually Exclusive” and “Assign Test limits” checkboxes must be enabled and a unique Test limit must be assigned to each entry, the maximum Test limit being assigned to the most severe class. In the example above, the highest Test limit (4) has been assigned to the most severe class (“Category I – Catastrophic”).
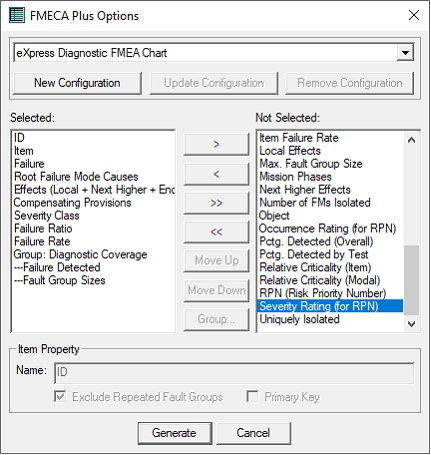
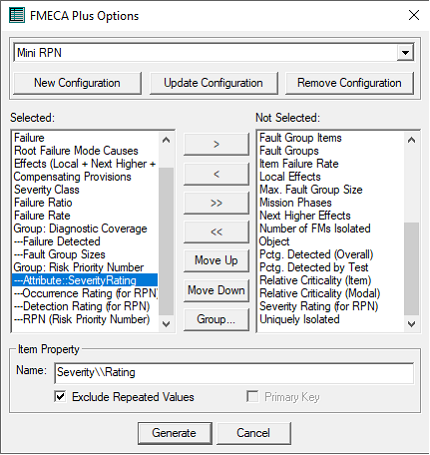
There are two ways that the RPN severity rating can be used within an eXpress FMECA chart. First of all, it can be included in its own column. To do this, select the “Severity Rating (for RPN)” entry from the list on the right- hand side of the FMECA Plus Options dialog and move it over to the list on the left. Once you have added this field, you can rename the column header using the “Name” box at the bottom of the dialog. Use the “Move Up” and “Move Down” buttons to modify the order in which columns will appear in the FMECA.
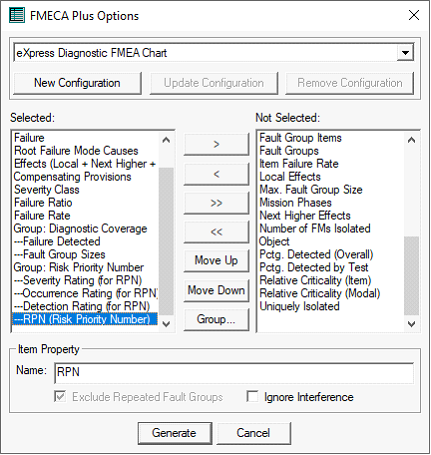
Of course, the severity rating is also used when calculating the Test limit that appears in the Risk Priority Number (RPN) column. In the example at left, the column “RPN (Risk Priority Number)” has been added to the FMECA, along with the columns for the individual severity, occurrence and detection ratings.
In this example, all four RPN-related columns have been included in a column group labeled “Risk Priority Number” and the “RPN (Risk Priority Number)” sub-column has been renamed “RPN” (as shown at right.
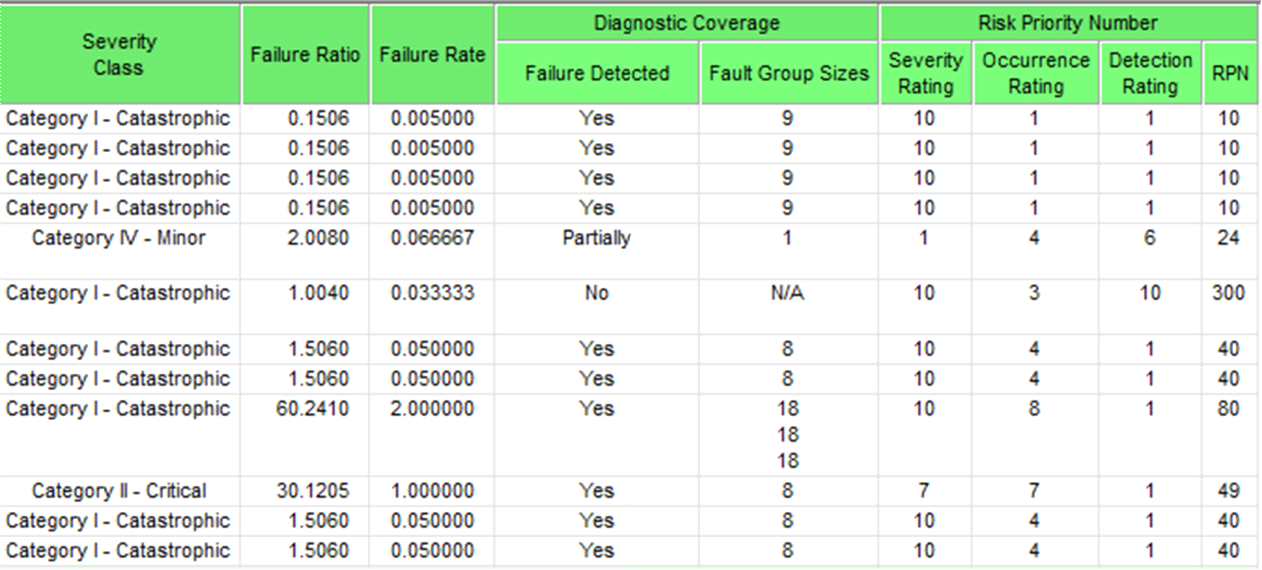
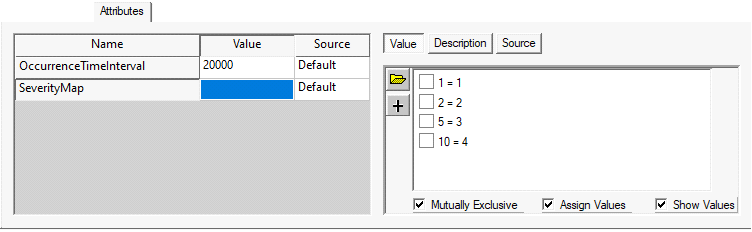
The following excerpt show how the final columns from the preceding example would appear in a calculated FMECA chart: In this example, the Test limits 1, 2, 3 & 4 assigned to the MIL-STD-1629A severity rankings have been mapped to 1, 4, 7 & 10 in the 10-point severity rating. If you wish to change how the Test limits map, you can do so by creating a Analyst-defined severity map attribute. This attribute must be created as follows:
It must be named “SeverityMap”
It must be of type Checklist
It must be associated with the Design
It must be “Mutually Exclusive”
It must have Test limits assigned
It must have one entry for each Severity rating (on a ten-point scale) to which Severity class Test limits will be mapped (in the example below: 1, 2, 5 & 10)
For each entry, assign the minimum Severity Class Test limit that is to be mapped to that entry (in the example below, the Severity Class 4 and above will be mapped to severity rating 10)
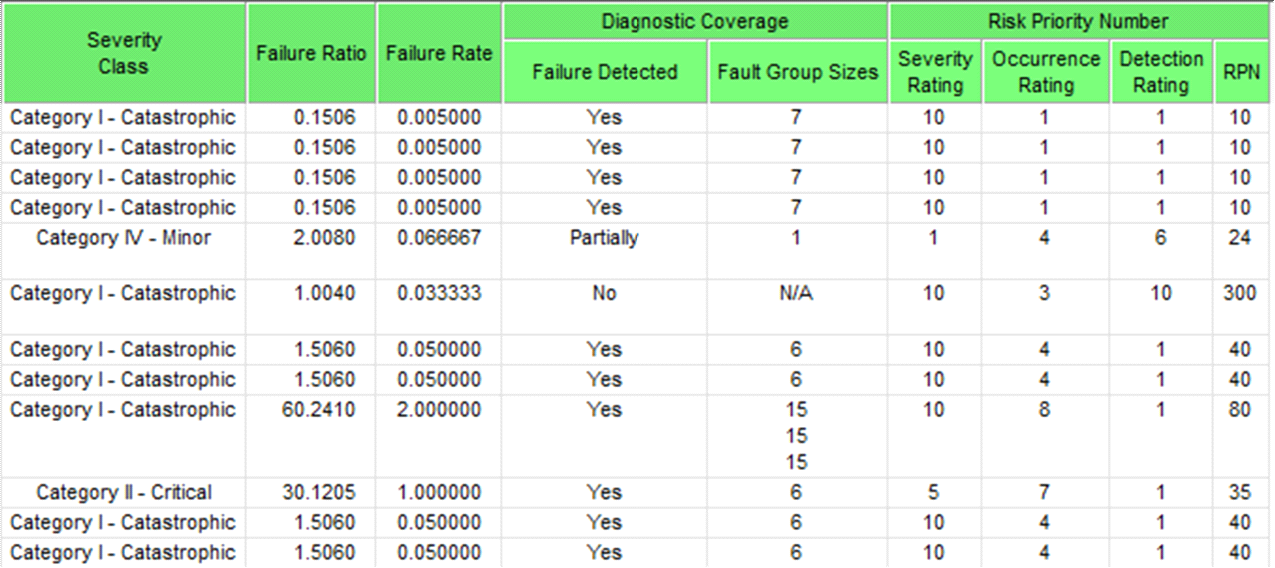
The following excerpt shows how the Severity rankings would be calculated when the severity map attribute shown above is defined in the model where the FMECA is run.
As you can see, the 4-point MIL-STD-1629A severity rankings have now been mapped to 1, 2, 5 & 10 in the 10-point severity rating. The calculated RPN takes this change into account as well.
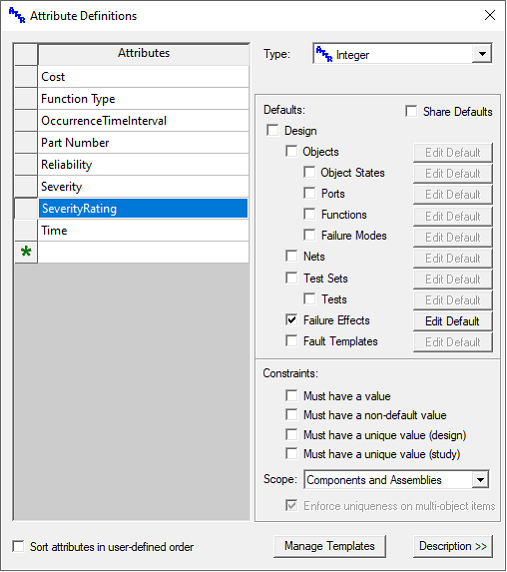
One final way in which you can define RPN severity Test limits in eXpress is to create a Analyst-defined severity rating attribute. This allows you to manually define (or import) the severity rating for each failure effect and have this Test limit used when calculating the final Risk Priority Number.
Create an integer attribute named “SeverityRating”. Associate the attribute with Failure Effects. Use this attribute to separately define the Test limit to be used for the RPN severity rating for each failure in the FMECA. Notice that these attribute Test limits must be assigned to the object failure effect that are represented by each row in the FMECA, not to the design effects that appear as local, next higher or end item effects. This gives you greater freedom in assigning severity ratings. You are not restricted to Test limits between 1 and 10. You are also not required to enter the same Test limit for failures with the same Severity Class.
When the severity rating attribute is included as a column in the FMECA, the Risk Priority Number will be calculated using the Test limits from this attribute, rather than the built-in severity rating calculation.
The FMECA setup pictured at left is nearly identical to the one shown previously—the only difference is that the “SeverityRating” attribute is used for the severity rating. Because the name of the attribute (with no space) would look odd as a column header, you can insert a carriage return (a double back-slash) into the column name. Inserting a space would also do the trick.
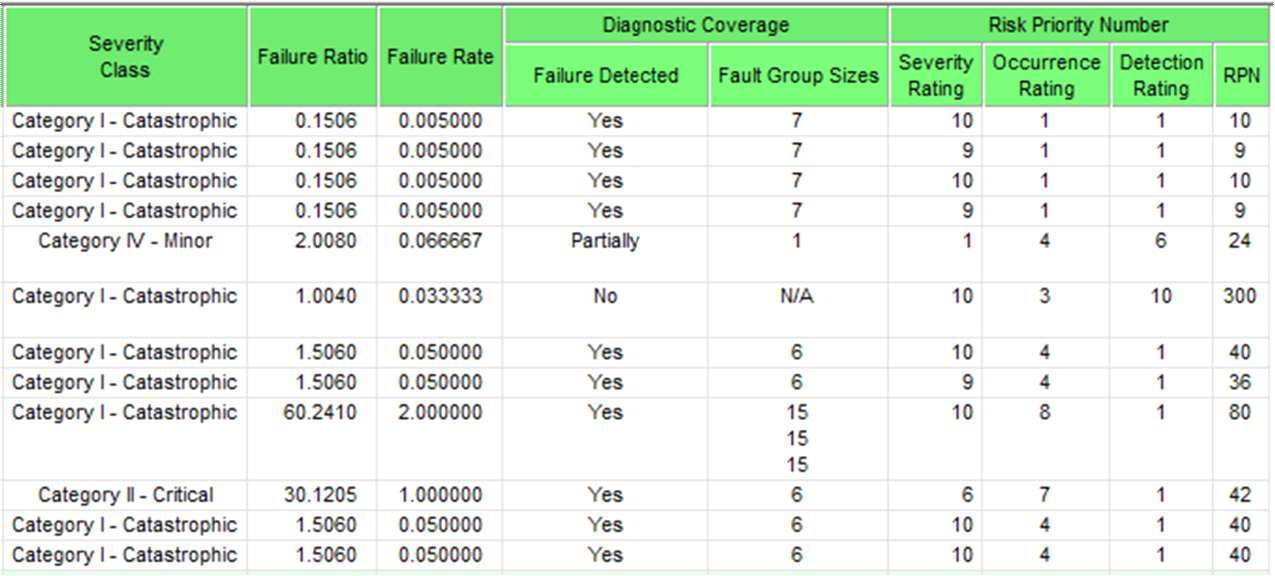
In this final FMECA excerpt, the RPN is calculated using a Analyst-defined severity rating attribute, rather than the built-in severity rating calculation.
Notice: that, for some failures, the top severity class (“Category I – Catastrophic”) has been assigned a rating of 10, and for others a rating of 9. Although this approach gives you the flexibility to do this, it also requires you to enter or import individual severity rating Test limits for all object failure effects that constitute a line item in the FMECA. The two approaches discussed earlier both derive the severity rating from the assigned severity class. As expected, the RPN column uses the Test limit from the attribute, rather than the built-in calculation.