Prognostics!!
NOTE: In order to minimize the impact for diagnostic engineers who have no interest in prognostics, the eXpress prognostics capability remains mostly hidden until the Usage field for one or more test sets has been set to ―Prognostics.
Prognostics allows not only the evaluation of system-level prognostic effectiveness, but also the ability to take prognostics performance into consideration when evaluating diagnostic effectiveness. Note that prognostic usage is specified at the test set level, rather than at the test level. Although this approach requires that each test set contain either only prognostic measurements or only diagnostic tests, it nevertheless simplifies the task of setting up different scenarios within a diagnostic study.
|
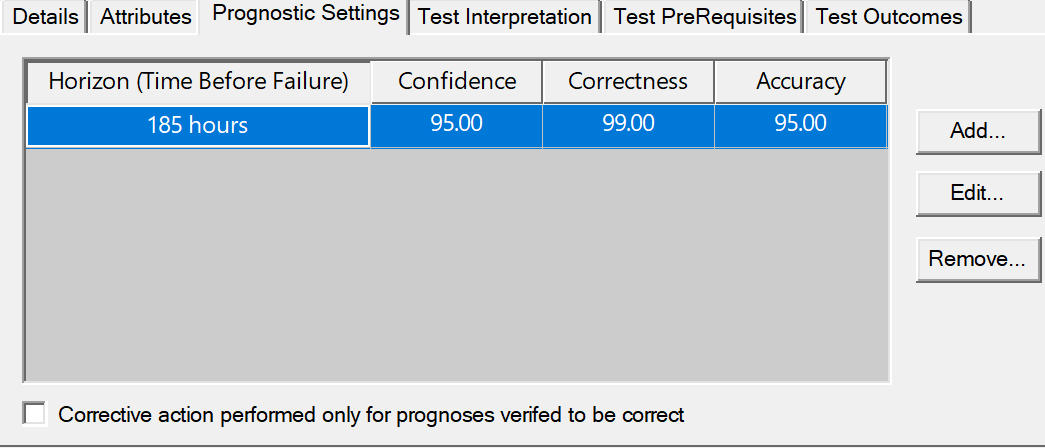
For prognostic test sets, the following Prognostic Settings panel now appears during test editing:
For this example the Horizon time was set to 185 hours of driving time (70MPH) which equates to 13000 miles until tire replacement with 95% confidence level.
|
|
This panel is used to specify the expected behavior of the associated prognostic measurement. The Horizon field is used to specify how long before failure a prognosis can occur. The Confidence field is used to specify the likelihood that the failure will be prognosed prior to the time specified by the Horizon. The Correctness field is used to specify the likelihood that a prognosed failure will actually occur during the given horizon. The Accuracy field is not entered by the analyst; by default, it is set to the value in the Confidence field. When the ―Corrective action performed only for prognoses verified to be correct‖ option is enabled, however, the Accuracy is calculated as the product of the Confidence and Correctness percentages. Horizon, Confidence and Correctness values can also be edited in Grid View.
By default, a single horizon record will be defined for every prognostic test (that is, every test definition within a test set whose Usage has been set to ―Prognostics only‖). The default Horizon is ―0 hours‖ (with both Confidence and Correctness set to 100.00). These default values are interpreted within eXpress as ―this prognosis will always occur sometime prior to failure‖. If the analyst’s goal is to perform a system analysis of prognostic effectiveness, then they will probably wish to enter both Horizon and Confidence values (taken from system prognostic requirements if the expected behavior is not yet known). If, on the other hand, the analyst’s intent is to perform a prognostics-aware analysis of system testability, reliability or maintainability, then Accuracy may be the only critical field (since it specifies the likelihood that a given prognoses will fail to occur—and will therefore have to be handled by the diagnostics).
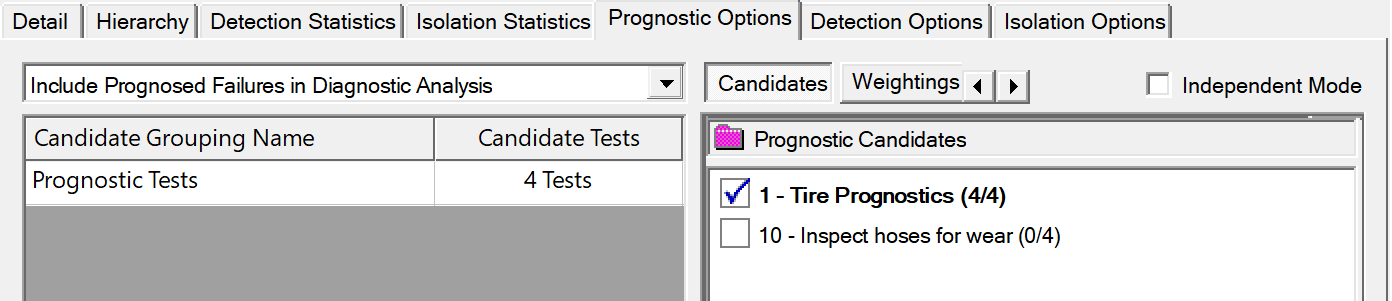
Once prognostic tests have been added to a model, the following Prognostic Options panel will appear within any diagnostic studies created for that model:
On the right side of the panel is a list of all ―prognostic‖ tests sets in the current model. On the left side of the panel is a drop box that allows the analyst to select one of the following two eXpress prognostic algorithms (each of which determines how prognostics will be handled in the study):
Included Prognosed Failures in Diagnostic Analysis – when this algorithm is selected, then individual prognoses (and their associated fault groups) will be included in the Diagnostic Flow Diagram. Fault groups that are associated with prognoses will be incorporated into any analyses performed within that study (including all calculated testability and maintainability numbers). For failures that are both prognosed and diagnosed (due to less than 100% confidence in the prognosis), the prognostic accuracy will be used to determine how the failure probabilities will be split between prognostic and diagnostic fault groups.
Exclude Prognosed Failures from Diagnostic Analysis – when this algorithm is selected, then all diagnostic-related analyses (testability, reliability, etc.) will be performed across only the non-prognosed portion of the design. Fully prognosed failures will be automatically ignored during analysis—just as if the Diagnostic Scope had been constrained using a subset containing all non-prognosed failures. For partially-prognosed failures (failures for which prognosis is less than 100% accurate), the relative failure probability will be reduced to reflect the likelihood that the failure occurred, yet was not prognosed.
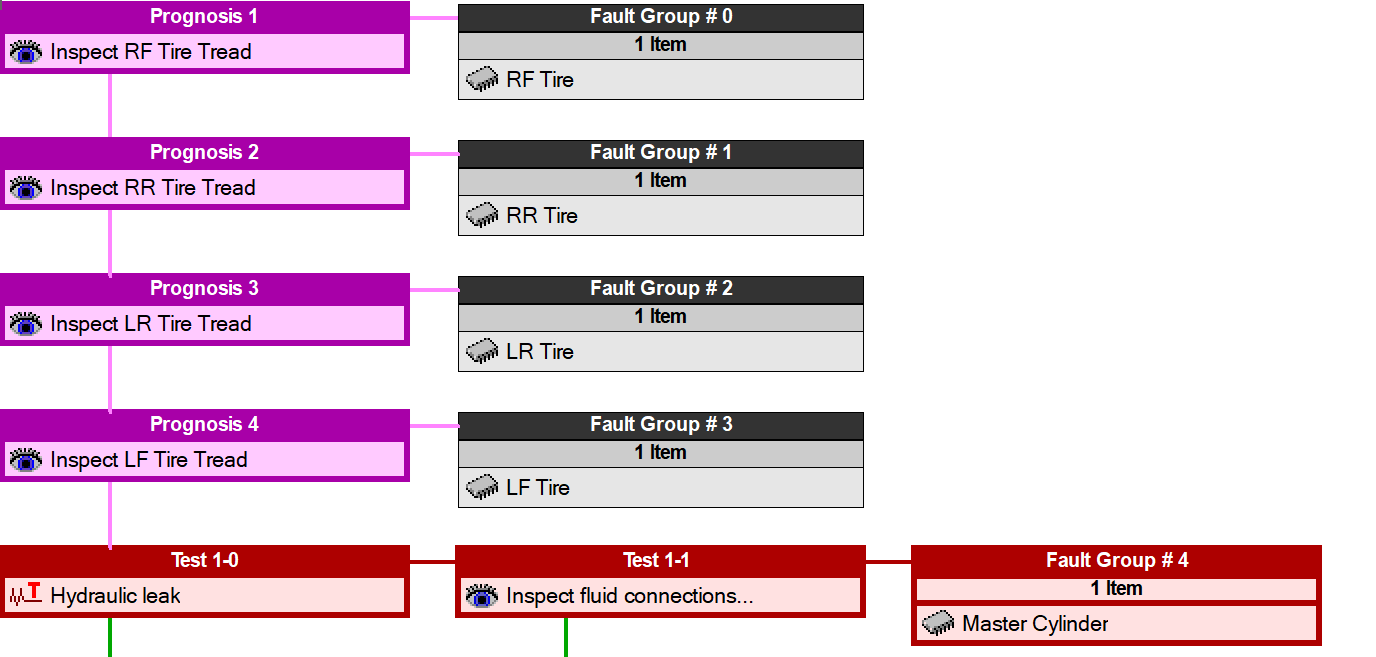
When prognostics are calculated using the ― Included Prognosed Failures in Diagnostic Analysis‖ algorithm, then new ―Prognosis‖ nodes will appear in the Diagnostic Flow Diagram (see example above). These prognosis nodes will always appear at the beginning of the test sequence, prior to the first diagnostic test. The Fault Groups appear in black because they are never replaced as a result of Isolation but rather according to the Horizon time shown in the Context Window above.
When highlighted, these nodes will be color-coded a medium shade of magenta (as opposed to the blue, red and green used to distinguish diagnostic nodes in the current test sequence).
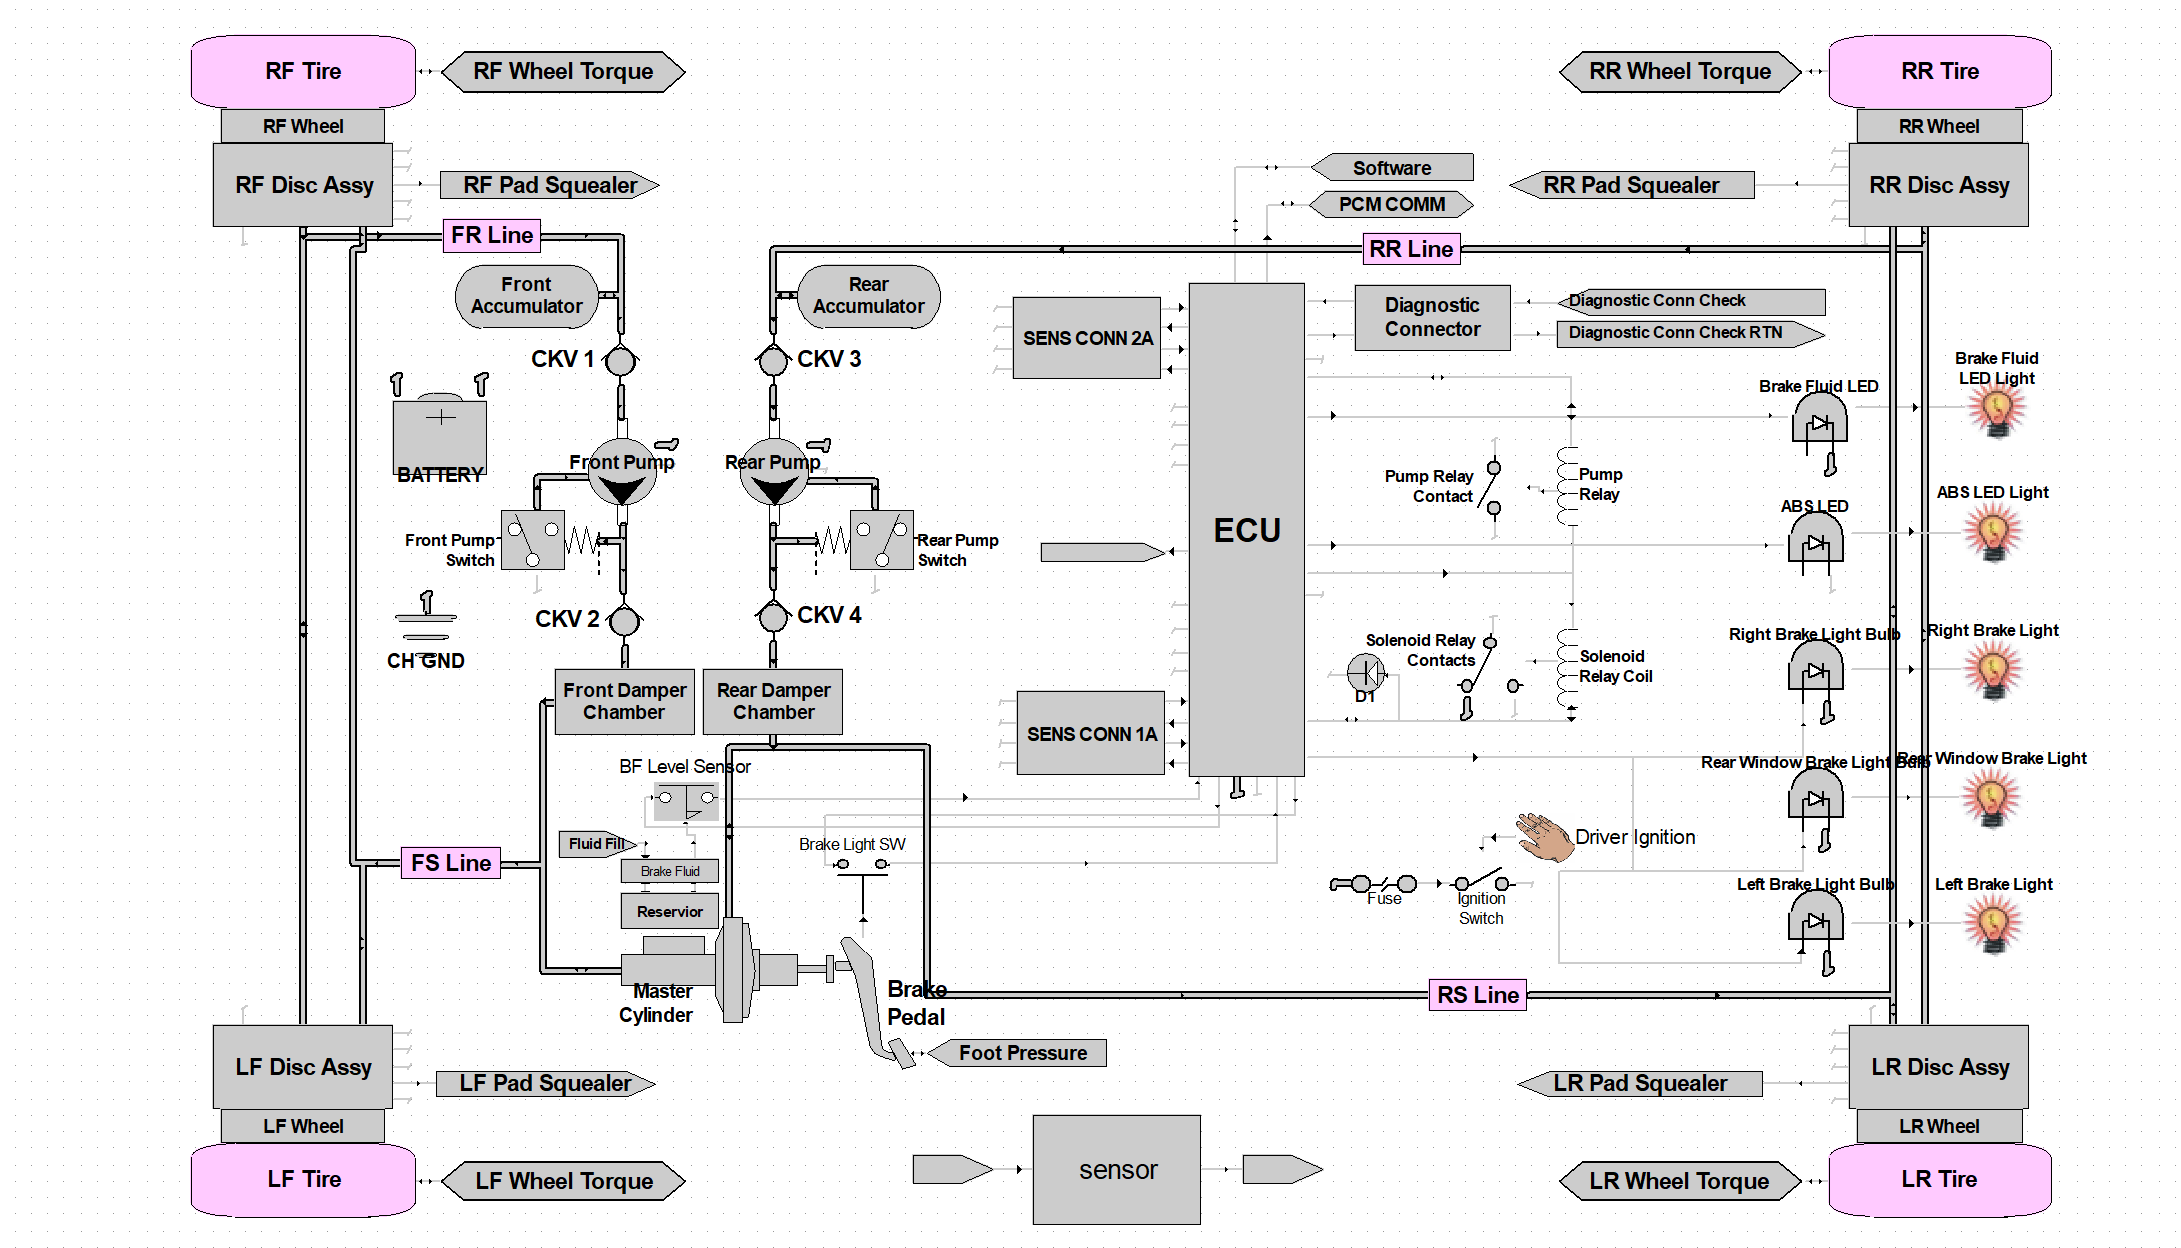
Magenta is also the color used to indicate prognosed items in the design drawing window of the diagnostic study. A medium shade of magenta is used to identify fully-prognosed items, whereas light magenta is used to indicate items that are partially prognosed (either because not all functions or failure modes of that item are prognosed, or because they are prognosed with less than 100% confidence).
This report contains:
1) a section summarizing system-level prognostic behavior,
2) a table that lists prognostic performance at each horizon, and
3) a table listing the details for each prognosis.